Lazy Dog Creations
The lazy way to M.U.G.E.N. Success!
By VinnyJ
Purpose:
Tutorial to help anyone willing to make a character from this game for M.U.G.E.N. by setting up everything needed for this specific task.First off, here's a checklist of what you'll need for this tutorial:
- PSOne Emulator with the P.E.Op.S. Soft GPU 1.17 plugin.
(This tutorial uses PSXEven 0.19, but you can use any PSOne Emulator)
Note: I will not send anyone the Playstation BIOS, as they are copyrighted by SONY.
- The Game (For obvious purposes, check eBay or Amazon.com)
- Graphics Editor
- Artmoney 7.18
(I'll use my version of Pro, but it works with the regular SE version.)
Note: images show an earlier version of Artmoney.
- My Artmoney Table for this game (available here)
- A good computer to run said emulator and a lot of hard drive space
- Optional: PSX or PS2 Pad to USB Adaptor
(Basically, for better control for ripping purposes)
Introduction:
If you've seen Joram's SF3 tutorial, you should already know how to prepare Artmoney for ripping, though I used 200 and 10 for the refresh and freezing values.
Also, if you find errors/omissions with this tutorial be sure to let me know.
I hope with the help of this tutorial you can incorporate this method into other games.
Though, You'll have to make your own table, read The DreamSlayer's tutorial (the site is gone, but there is a forum topic) in getting started with Artmoney.
STEP 1.
Start by running Artmoney and loading the table for the game.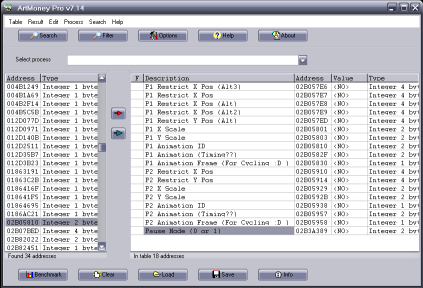
STEP 2.
Start up your PSOne Emulator.I'll assume, you know how to configure your other plugins for the Bios, Pad1&2,Sound, and CDrom,
so I won't go over it.
STEP 3.
Configure the P.e.o.p.s. plugin as shown below: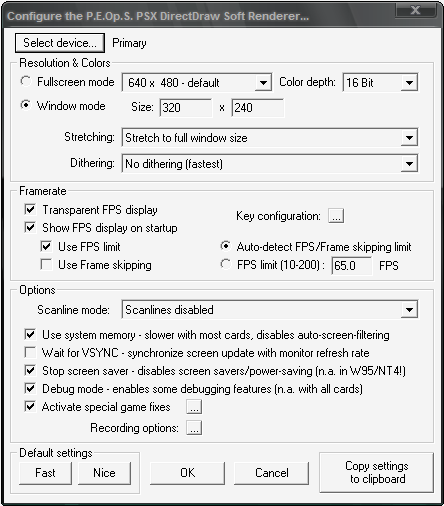
Additionally, in the "Activate Special Game Fixes" section check the "Use PC fps calculation" (In the [...] box)
STEP 4.
Load the Game CD or ISO in the Emulator.Double-check if there's an "*" next to the letters "FL", if there isn't, press the Home Key until there is.

STEP 5.
Now go back to Artmoney, in the dropdown box called "Select Process", select the Emulator's process, so we can manipulateits values for the game.
STEP 6.
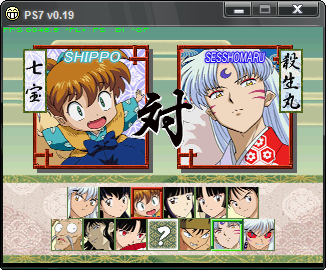
Back in the emulator, make your way into the Training , and select the character that you want to rip andpick either Inuyasha,Miroku or Sesshomaru as your training opponent, depending on the colors of the character that you are ripping.
(Which means, make sure the two characters don't contain colors that can blend into each other, the reason why is explained in the next step.)
STEP 7.
This is where we set up everything for ripping sprites.(Oh goody! :P)
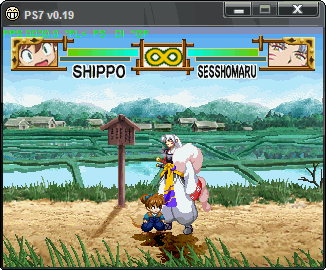
For instance, let's say we're ripping Shippo.
Stand him next to the opponent, in this case, Sesshomaru.
STEP 7a.
Fixing the table to work on your computer.
Since this table came from my computer, the offsets will be
off.
In order to fix this, we will have to search for one of the
values in the Artmoney table and offset it to the rest of the
table.
We'll be looking for P1's Animation ID.
In the emulator, Leave Player 1 in his standing pose
and pause the game.
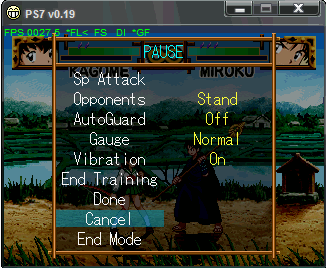 Back in Artmoney, Click Search, In the Search box, We'll
be looking for an exact value.
The value we're going to look for is 1.
(The reason that we're looking for 1, is because
it's the ID number to the Stand animation in this game.)
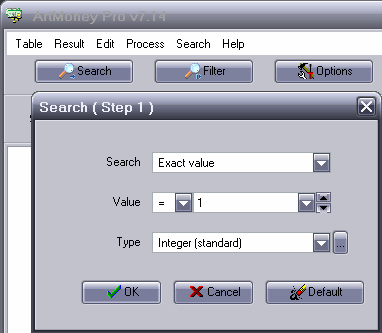
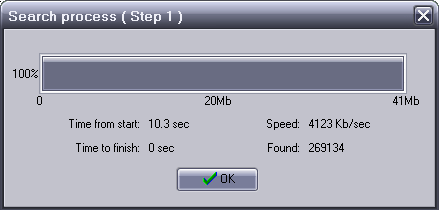
OK it, it'll search and give a lot of addresses, that's
normal.
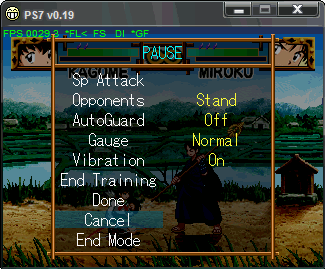
Unpause the game, make Player 1, crouch and pause the
game again.
Click Filter, change the value to 4 and OK it.
(You might've guessed, 4 is the Animation ID for
crouching)
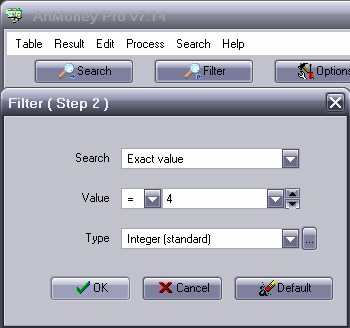
This time it should find less values., once again unpause
it and stand up Player 1, and pause it.

Repeat the previous step, but this time with a value of 1, it
gave me 8 results.
(Your amount of results may vary.)
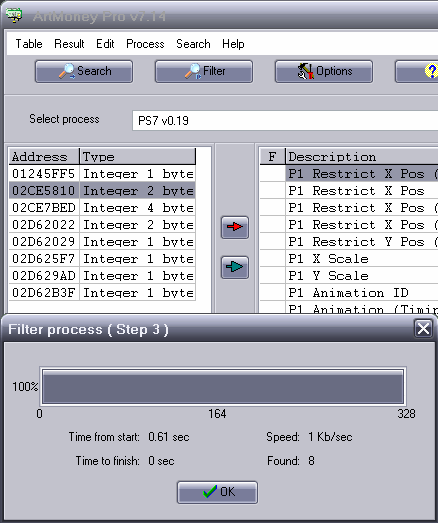
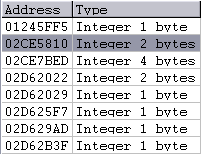
One of the addresses should end with 5810, this
is the Animation ID for Player 1
(I know because I made this table and have found the
address many times to offset it correctly. :P )
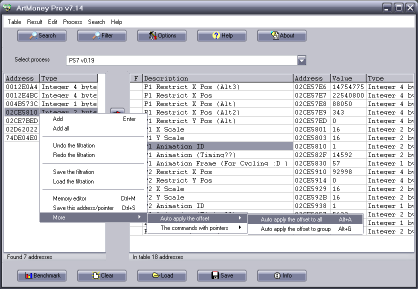
Select the 'P1 Animation ID' entry in the table.
(On the right side)
Then select the address, the one with 5810 on the
end of it. (on the left side)
Right-click on it, then go to:
More > Auto Apply the Offset
> Auto Apply the offset to all.
The P1 Animation ID should have changed to 1, meaning
you did it right and your table is correct.
STEP 8.
We will now adjust and freeze a few values to help us rip Shippo.We're going to freeze P1 in midair, by having him jump and pausing the game.
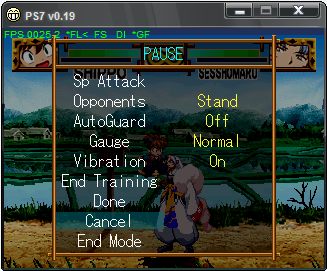
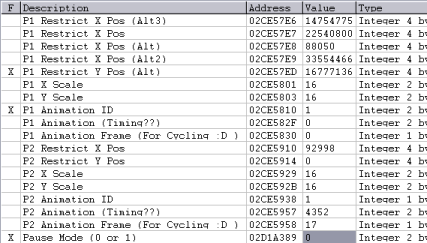
We will do several things to the Artmoney table, if confused look at the image below.
Change and Freeze his Animation ID to 1 in the Artmoney table
Freeze his Y Position (as a safety measure)
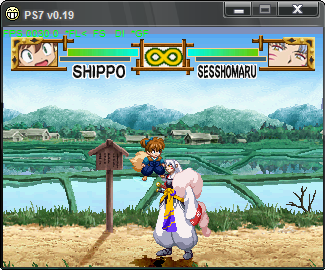
Finally, Change and Freeze the Pause Mode to 0, to remove the pause screen, though the game is still paused, this is what we want.
This is how it should look so far.
(Some of your values may be different due to positioning or whatever, that's fine.)
This is how the game should look afterward.
STEP 9.
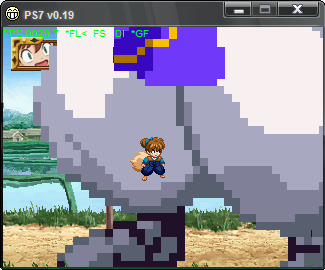
Now we scale Sesshomaru.Change and Freeze P2's X and Y scales to 127 (any higher and he flips downward and disappears.)
Sesshomaru maybe off the ground just a tad, play around with his X and Y positions until the gray of his pants surround Shippo.
Like so:
STEP 10.
Like in Joram's Tutorial, you will have to set up Special Hotkeys to advance by 1 frame on the "P1 Animation Frame (For Cycling)"(Right-click and select "Edit", set it up like so.)
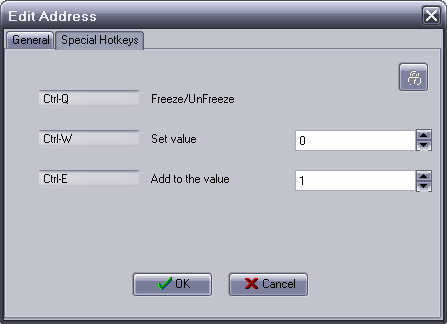
Back to the game, set the Animation Frame to 0 with the Shortcut you just made and Shippo will switch to the beginning frame of the stand animation.
Take a screenshot with F8, the Peops GFX Soft plugin will output the screenshot and a text file in the emulator's 'snap' folder.
Add 1 to the number with the other shortcut you just created and take another screenshot, continue this until you reach the end of the animation.
You'll know when the animation is over, when the character disappears.
Cleaning will be a breeze and even better, you already have the sprites all lined up!
Here's the zipped BMP file of what you'll get.
After cleaning... Wah-la!

(I didn't rip the entire animation, because it's too time consuming, but in your case you'll have a folder full of bmp files each containing a different frame of the current animation that you are ripping.)
My latest IY character WIPs, have some notes in the .air file with the Animation IDs listed for reference.
(Check Kagome's AIR file, for example.)
Well, I hope you liked this tutorial, and I hope it helps you in ripping from this great game.
Problems?
Is there anything you don't understand?
Any typos or errors?
Send me an email,
I will try to help you out or correct the errors you find.
